
Shrubs
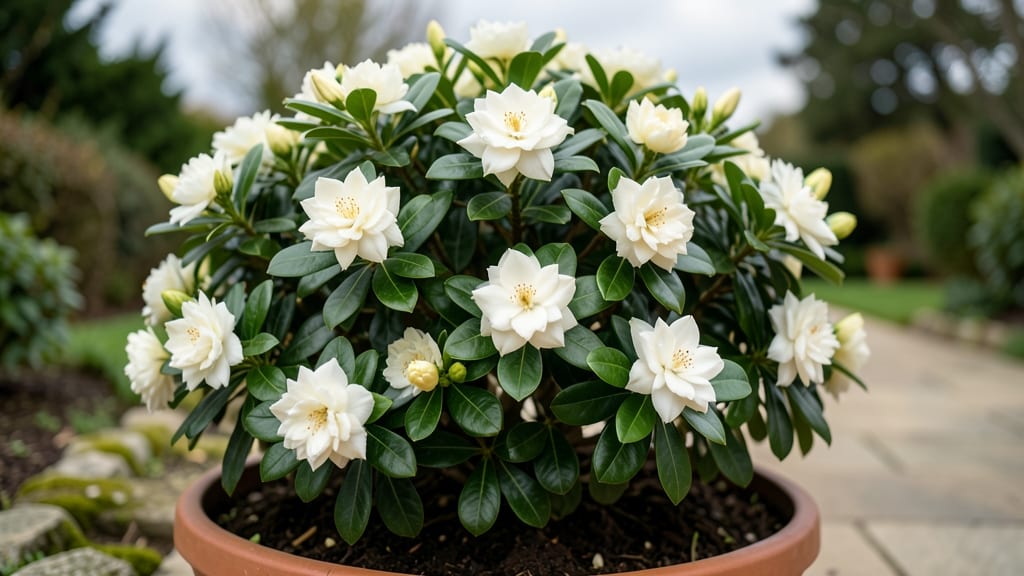
A full grown gardenia 🌸 thrives when you prune it right, and the difference between a few blooms and a lush, fragrant display often comes down to timing and technique.
Picture this: Your gardenia has been sitting in the same spot for years, dropping buds before they open or looking leggy and sparse. You’ve watered it, fed it, even moved it—but the blooms still feel half-hearted.
The secret? Pruning isn’t just about cutting back; it’s about encouraging the plant to focus its energy where it counts.
With the right approach, you can transform a struggling gardenia into a year-round bloomer. We’ll cover when to prune, how to shape it without stunting growth, and the three key mistakes that kill blooms faster than underwatering.
By the end, you’ll know exactly how to prune for more flowers, when to fertilize for maximum impact, and how to troubleshoot yellowing leaves or sparse blooms before they become permanent problems.
When and how to prune a full grown gardenia for maximum blooms
Pruning your full grown gardenia at the right time can transform it from a sparse bloomer into a year-round floral showstopper. The key lies in understanding its natural growth cycle and how strategic cuts encourage more buds.
Most gardeners wait until spring, but the best results come from a two-part pruning strategy—one in late winter and another after blooming. This approach prevents shocking the plant while maximizing flower production.
Timing is everything with gardenias. Prune too early, and you risk removing next year’s flower buds. Prune too late, and you may miss the chance to shape the plant before new growth begins.
The ideal window is February to early March for your first cut, followed by a light maintenance trim after blooms fade in summer. This two-step method ensures your gardenia stays lush while producing continuous blooms throughout the season.
-
Step 1: Gather the Right Tools
Use sterilized bypass pruners for clean cuts and a sharp saw for thicker branches. Disinfect tools with rubbing alcohol to prevent disease spread. -
Step 2: Identify Dead or Diseased Wood
Remove any brown, mushy, or hollow branches first. These won’t regrow and can harbor pests. Cut back to healthy green tissue or a side branch. -
Step 3: Thin Out Crowded Branches
Look for crossing branches or those growing inward. Remove 1/3 of the oldest growth to encourage new, flower-producing stems. -
Step 4: Shape the Plant
Trim overly long branches to maintain a rounded, open shape. Avoid cutting into the center of the plant to prevent congestion. -
Step 5: Deadhead Spent Blooms
After flowers fade, snip off the entire stem down to a leaf node. This redirects energy to new blooms instead of seed production. -
Step 6: Fertilize After Pruning
Apply an acid-loving fertilizer (like 8-3-9) to support new growth. Water deeply to help roots recover from the stress of pruning.
One of the most common mistakes gardeners make is pruning too aggressively. A full grown gardenia can handle up to 25-30% of its foliage removed in one session, but exceeding this can stress the plant and reduce blooms.
Focus on selective thinning rather than heavy shearing. For example, if your gardenia has 20 branches, aim to remove 5-6 of the oldest or weakest rather than cutting back all branches by half.
Another critical tip is to always cut at a 45-degree angle just above a leaf node or outward-facing bud. This encourages growth in the right direction and prevents water from pooling on the cut, which can lead to rot.
Use your pruners to make clean cuts—ragged edges slow healing and invite pests. If you’re dealing with a particularly thick branch, step back and make two cuts: the first to remove the bulk, then a second to clean up the edge.
Seasonal timing plays a huge role in bloom production. While late winter is ideal for structural pruning, don’t forget the summer deadheading step. After each flower fades, pinch it off at the base. This might seem tedious, but it’s the secret to non-stop blooms.
I once had a gardenia that produced flowers year-round because I made it a habit to deadhead every 2-3 days during peak bloom season. The difference was staggering!
If your gardenia has become overgrown or leggy, don’t panic—it can still be revived with the right approach. Start by removing up to 1/3 of the oldest wood to encourage younger, more vigorous growth.
For severely neglected plants, you can even prune back harder in stages, giving the plant time to recover between cuts. Just be patient; it may take a full growing season for the gardenia to bounce back with lush foliage and abundant blooms.
Light conditions also influence pruning success. Gardenias thrive in partial shade, but if yours is in a sunny spot, it may need more frequent watering after pruning. The stress of cutting combined with hot afternoon sun can cause leaf scorch.
If you notice yellowing leaves after pruning, move the plant to a shadier location for a few weeks to help it recover. Mulching around the base with organic matter also retains moisture and supports root health.
Finally, never prune a gardenia in fall or winter unless you’re in a mild climate (USDA Zone 9b and above). Cold temperatures slow growth, and pruning at this time can leave the plant vulnerable to frost damage or disease.
Instead, focus on light maintenance like removing dead blooms or diseased branches. The goal is to keep the plant healthy enough to rebound in spring with a burst of new growth and flowers.
With these techniques, your full grown gardenia will reward you with glossy leaves and fragrant blooms all season long. The key is consistency—prune at the right times, use the proper tools, and give your plant the care it needs to thrive.
Before you know it, your gardenia will be the showpiece of your landscape, drawing admiration from everyone who sees it. 🌸
Garden pruning secrets: how to revitalize a full grown gardenia after neglect
If your full grown gardenia has become overgrown or stopped blooming, don’t panic—it’s often a sign of neglected pruning rather than irreversible damage. Gardenias thrive when pruned strategically to remove dead wood and encourage new growth.
The key is identifying where the plant needs correction versus routine maintenance. Many gardeners mistakenly prune too late in the season or cut back too aggressively, which can stress the plant and reduce flowering.
Before you grab your pruners, assess your gardenia’s condition. Look for yellowing leaves, bare branches, or overcrowded growth—these are red flags that your plant needs corrective pruning.
Unlike regular maintenance, which focuses on shaping and deadheading, corrective pruning involves removing up to 30% of the plant’s foliage to stimulate rebirth. The goal is to restore balance while preserving the gardenia’s natural shape and blooming potential.
Start by removing dead or diseased branches first—they drain energy from healthy growth. Use clean, sharp pruners to make 45-degree cuts just above a leaf node or bud. This encourages outward growth rather than inward, which can lead to a denser, bushier plant.
For severely neglected gardenias, focus on thinning out the oldest wood (typically the largest branches) to redirect energy to younger, more productive stems.
Once you’ve addressed the dead wood, shape your gardenia by trimming back overgrown branches to maintain its natural form. Avoid cutting into the woody center of the plant, as this can create a "donut hole" effect that’s hard to recover from.
Instead, aim to open up the center for better airflow and sunlight penetration, which reduces disease risk and encourages more blooms. Think of it as giving your gardenia a haircut that promotes health rather than just aesthetics.
After pruning, your gardenia will need extra care to recover. Increase watering slightly for the first few weeks to help the plant establish new roots and foliage. Apply a balanced, acidic fertilizer (like 8-3-9) to support regrowth, and keep the soil consistently moist but not soggy.
Mulch around the base to retain moisture and regulate soil temperature. With proper aftercare, you should see new growth within 4-6 weeks and a fuller, more vibrant gardenia by next blooming season.
Remember, pruning a neglected gardenia is a two-step process: first correct the damage, then maintain the results. By following this approach, you’ll not only revive your plant but also set it up for years of abundant blooms.
The key is patience—your gardenia will thank you with fragrant flowers and lush foliage once it regains its balance. 🌸✂️🌿