
How To
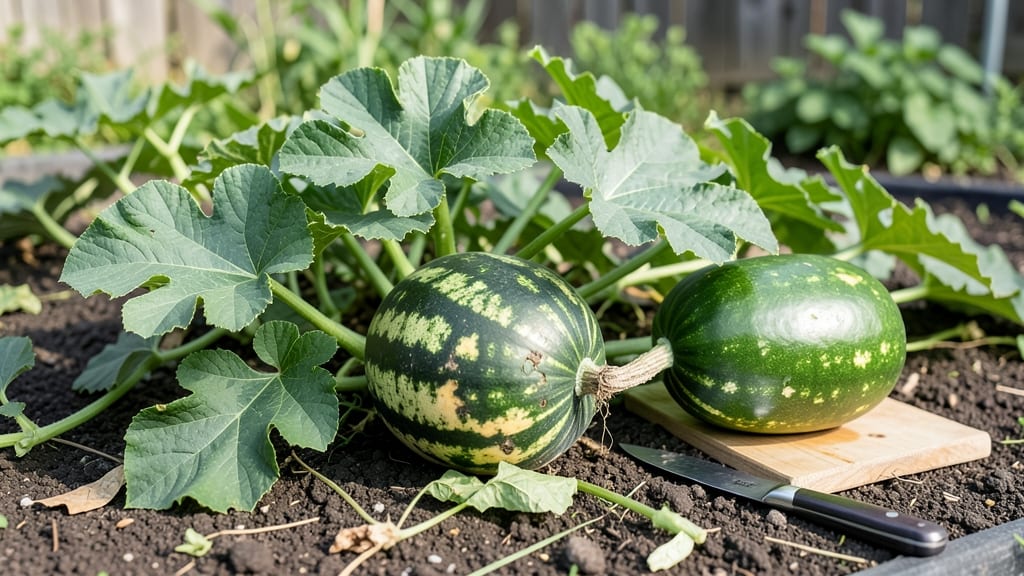
To know when to pick watermelon from your garden, watch for these key ripeness cues: a fully colored rind, a crispy brown tendril, and a hollow thump when tapped.
Nothing beats the excitement of harvesting a perfectly ripe watermelon straight from your garden—except the disappointment of cutting one open too early. I’ve sliced into watermelons that were still rock-hard inside or overly watery, and trust me, you don’t want that.
Watermelons in Zone 6a typically reach peak ripeness between July and September, but timing depends on your variety and growing conditions. The good news? You don’t need a degree in botany to tell when they’re ready—just a few simple tricks.
In this guide, I’ll walk you through five foolproof ripeness tests, including the field spot, thump test, and stem curl, so you can pick your watermelons at their sweetest. No more guesswork!

5 Proven ripeness tests to pick watermelons at peak sweetness
Nothing beats the excitement of harvesting a perfectly ripe watermelon straight from your garden—except the disappointment of cutting one open too early. Knowing the exact moment to pick ensures sweet, juicy perfection every time.
The key lies in understanding 5 science-backed ripeness tests that reveal when your watermelon is ready to harvest. These methods go beyond guesswork and help you avoid both underripe and overripe fruit.
Watermelons don't ripen further after picking, so timing is everything. The field spot test, thump test, and stem curl method are my top go-to techniques, but each has its own strengths.
I've tested them all in my garden over the years, and combining 2-3 methods gives the most accurate results. Let's dive into each test so you can confidently pick your watermelons at their sweetest.
-
1. Field Spot Test
Look for a creamy yellow spot on the underside of the watermelon where it rested on the ground. This indicates full ripeness and sugar development. -
2. Thump Test
Tap the watermelon with your knuckles. A ripe one will sound hollow and deep. If it sounds dull, it's not ready yet. -
3. Stem Curl Test
Check the stem nearest the fruit. If it's dry and curled under, the watermelon is ready. A green, flexible stem means it needs more time. -
4. Ground Spot Test
The rind color where the watermelon touched the ground should be solid and fully colored (yellow, cream, or green, depending on variety). -
5. Overall Color Change
The entire rind should be uniformly colored with no green patches. Stripes should be bold and defined, not fading.
The field spot test is my favorite because it's foolproof—no tapping or guessing required. That creamy yellow patch appears when the sugars fully develop, and it's a dead giveaway that your watermelon is ready.
I've found this method works especially well for seedless varieties, which can be trickier to judge by other methods. Start checking for this spot about 2-3 weeks before the expected harvest time, as it appears last in the ripening process.
For the thump test, I recommend using your knuckles instead of your fist to avoid bruising the fruit. A ripe watermelon should produce a deep, resonant sound, almost like a drum. If you're unsure, compare it to another watermelon you know is ripe.
This test works best in the morning when the fruit is cool and firm. Remember, overripe watermelons can also sound hollow, so always pair this test with another method.
The stem curl test is often overlooked but incredibly reliable. That small tendril near the stem of the watermelon is a natural indicator. When it turns brown and curls under, it's a sign the fruit is ready to be picked.
This happens because the vine stops supplying nutrients to that spot once the watermelon is fully ripe. I like to check this first thing in the morning when the stem is less likely to be damaged by dew or rain.
Don't overlook the ground spot test, which is especially useful for striped varieties. The area where the watermelon touched the ground should be fully colored and free of any green patches. This is where the fruit absorbs the most heat and ripens fastest.
If the ground spot is still green or patchy, give your watermelon another week or two. This test is particularly helpful in hot climates where ripening can happen quickly.
Finally, the overall color change is the most visual cue. A ripe watermelon's rind should be uniform in color, with no green patches at all. For varieties with stripes, those lines should be bold and crisp, not fading or blending together.
I always check this last because color changes can happen gradually. If you're growing heirloom varieties, pay extra attention to their specific color patterns, as they can vary widely.
To get the most accurate results, I recommend combining at least two tests before harvesting. For example, check for the field spot and perform the thump test on the same watermelon. If both indicate ripeness, it's time to pick.
This double-checking reduces the risk of mistakes, especially for first-time watermelon growers. And remember, harvesting at the right time isn't just about sweetness—it also affects storage life and flavor.
Once you've mastered these tests, you'll never second-guess your watermelon harvest again. The satisfaction of slicing into a perfectly ripe, sweet, and juicy watermelon straight from your garden is unmatched. Happy harvesting, and may your vine yield the most delicious watermelons of the season! 🍉
Common mistakes that ruin watermelon ripeness (and How to avoid them)
Even with perfect growing conditions, your watermelons can still end up overripe or underripe if you miss key signals. Heat stress, poor timing, and improper storage are the top culprits. Let’s fix these mistakes before your next harvest to ensure sweet, juicy perfection every time.
First, picking too late is a common trap. Many gardeners wait until the rind turns fully yellow or the vine dies back completely—both signs it’s past prime. By then, the fruit may be grainy or overly soft.
Instead, watch for the tendril nearest the fruit to turn brown and crispy, a foolproof cue it’s ready.
Another mistake? Ignoring heat stress during extreme summer days. When temperatures soar above 90°F, watermelons can overripen quickly on the vine. To combat this, mulch heavily with straw to keep roots cool and water deeply in the early morning to reduce stress on the plant.
Don’t rely on size alone—many watermelons stay small even when ripe. Instead, check these 3 key signs:
- Field Spot: The cream/yellow patch on the ground side should turn deep yellow or buttery.
- Thump Test: Tap the melon—if it sounds hollow, it’s ready (a dull thud means it’s underripe).
- Stem Curl: The stem nearest the fruit should dry and curl like a corkscrew.
Pro Tip: Pick in the morning when temps are coolest to preserve sweetness.
Storage blunders also ruin ripeness. After harvesting, never refrigerate watermelons until they’re fully ripe—cold temps stop sugar development. Instead, store them at room temperature (70-80°F) in a shady, dry spot for 3-5 days to let sugars fully develop. Once cut, refrigerate within 24 hours to prevent spoilage.
Finally, overcrowding plants leads to uneven ripening. Watermelons need 15-20 feet of vine spread to thrive. If your garden is small, opt for dwarf varieties like ‘Sugar Baby’ and prune excess vines to redirect energy to fruit development. This simple fix can double your success rate.
By avoiding these 4 common mistakes, you’ll enjoy consistently sweet, ripe watermelons straight from your garden. Next time, trust the tendril test and field spot over guesswork—your taste buds will thank you!