
How To
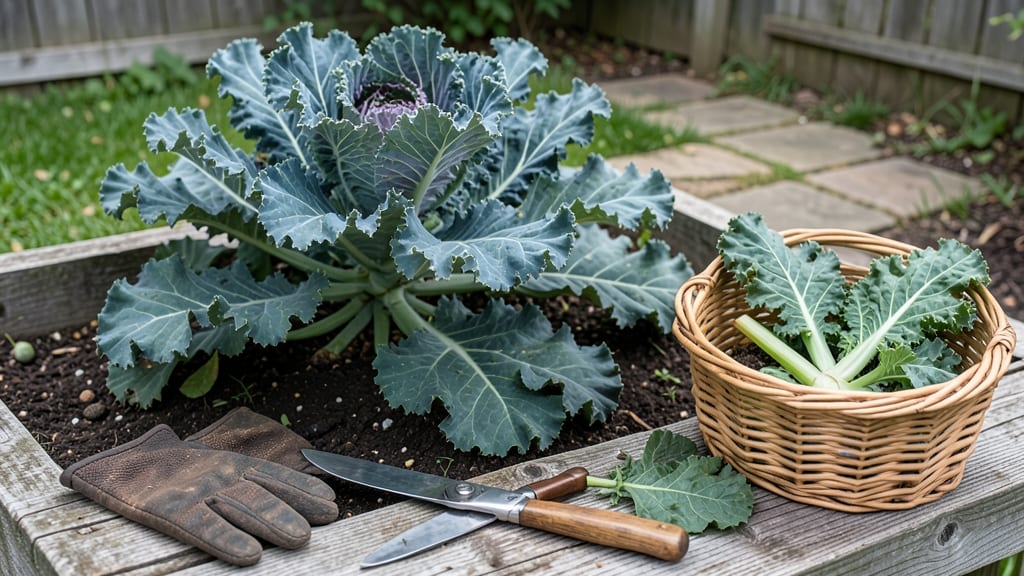
To pick kale from your garden at the perfect time means harvesting crisp, flavorful leaves that keep producing—without overdoing it.
Picture this: you reach for a leaf, and it snaps cleanly with a satisfying crunch, its deep green color still vibrant. That’s the moment you’ve been waiting for, but how do you know it’s really ready?
I’ll show you the 5 visual cues that guarantee you’re picking at peak freshness.
Timing matters more than you think. Harvest too early, and you miss out on full flavor; too late, and the leaves turn bitter or bolt. The key is in the leaves themselves—size, color, and even how they feel between your fingers.
Below, I break down exactly what to look for, plus the best way to cut (or pluck) without killing your plant.
By the end, you’ll know not just when to pick your kale, but how to do it so your garden keeps giving you harvest after harvest. No more guesswork, just perfect timing every time.
5 Visual cues to identify perfectly ripe kale for harvesting
Harvesting kale at the right time transforms your garden into a flavor powerhouse. Overripe leaves turn bitter, while underripe ones lack tenderness—both ruin the experience. The secret lies in these visual cues that reveal when your kale is primed for picking.
I’ve learned the hard way that ignoring these signs means sacrificing crisp texture and sweet flavor.
Start by checking the leaf size—this is your first clue. Kale leaves should reach 6-8 inches in length before harvesting. Smaller leaves mean the plant needs more time to mature, while oversized leaves may signal it’s past its peak.
I always compare my kale to a standard dinner plate—if the leaves are larger, it’s time to harvest.
Next, examine the leaf color. Perfectly ripe kale boasts a deep, vibrant green hue. Pale or yellowing leaves indicate stress, often from too much sun or not enough water.
Darker purple or red veins? That’s normal for certain varieties like Lacinato or Red Russian kale. But if the entire leaf turns dull, it’s overripe.
🌱 How to Pick Kale From Your Garden
- Check leaf size—aim for 6-8 inches long.
- Look for deep green or vibrant purple coloring.
- Test leaf texture—it should feel firm but slightly tender.
- Bend the stem—it should snap crisply, not bend easily.
- Inspect the center stem—it should be thick and sturdy, not woody.
Don’t overlook the leaf texture, which tells you everything about tenderness. Run your fingers over the leaves—ripe kale should feel firm but slightly pliable, almost like a well-washed green. If the leaves feel tough or fibrous, they’re not ready.
I once picked kale that felt like sandpaper, and it was inedible! Conversely, if the leaves feel too soft or mushy, they’ve been overwatered or left too long in the heat.
The stem thickness is another game-changer. A ripe kale stem should be thick and crisp—bend it slightly, and it should snap cleanly. Thin or woody stems mean the plant is past its prime.
I always test this by gently twisting a leaf near the stem. If it resists and feels sturdy, it’s harvest-ready. This trick has saved me from picking kale that was already toughening up.
Finally, pay attention to the leaf shape. Mature kale leaves should be large and flat, not curled or tightly packed. Curled leaves often mean the plant is either underwatered or overcrowded.
I once had a batch of kale that curled because I forgot to thin my seedlings—lesson learned! For varieties like Curly Kale, the leaves should still be flat at the edges, not tightly spiraled.
One of my biggest mistakes was harvesting kale based on calendar dates instead of visual cues. Kale doesn’t follow a strict timeline—it ripens based on environmental conditions. If your garden is cooler, your kale may take longer to mature.
Conversely, in hotter climates, kale can bolt (go to seed) faster. Always trust your eyes over the calendar.
Pro tip: Harvest in the morning after the dew has dried but before the sun intensifies. This ensures the leaves are crisp and hydrated, making them easier to judge for ripeness.
I’ve noticed that morning-picked kale stays fresher longer in my fridge, too. Plus, the flavors are more vibrant when harvested at the coolest part of the day.
If you’re unsure whether your kale is ready, pick a few leaves and taste them. Ripe kale has a sweet, earthy flavor with a satisfying crunch. If it’s bitter or bland, it’s not ready.
This simple test has saved me from wasting overripe kale more times than I can count. Now, I always keep a small sample aside to taste-test before committing to a full harvest.
Mastering these 5 visual cues will turn you into a kale-harvesting pro. Soon, you’ll be picking leaves that are perfectly tender, deeply colored, and packed with flavor. And the best part? Your kale will keep producing more leaves for weeks if you harvest correctly. Happy harvesting!
How to harvest kale without damaging future growth
Harvesting kale correctly is key to maintaining a productive plant. Unlike many vegetables, kale can regrow after harvesting, but you must use the right techniques to avoid stunting future growth. I’ve learned that cutting leaves properly encourages the plant to produce more tender, flavorful leaves over time.
The goal is to remove leaves without harming the growing point at the center.
Start by harvesting outer leaves first—this allows the inner leaves to continue growing. Use clean, sharp scissors or pruning shears to cut leaves about 1 inch above the stem. This small gap helps prevent disease while allowing new growth.
Avoid tearing leaves, as this can damage the plant and invite pests. For young plants, you might remove just a few leaves at a time to encourage robust growth.
If you’re harvesting a mature plant for a large harvest, you can cut the entire plant about 2 inches above the soil line. This method is best for late-season harvests or when you want to preserve the plant’s energy for regrowth.
After cutting, leave the stump in the ground—it will often produce new leaves, especially if you provide consistent water and nutrients.
Harvesting more than 1/3 of the plant at once can stress kale and reduce future yields. Signs of over-harvesting include yellowing leaves, stunted growth, or a bare center stem. If you notice these, reduce harvesting frequency and focus on outer leaves only.
Pests like aphids and cabbage worms are more likely to attack stressed plants. Always inspect leaves before and after harvesting to catch early signs of infestation.
After harvesting, give your kale plant some post-harvest care to encourage regrowth. Water deeply to replenish moisture lost during the harvest, especially if the weather is hot. A light application of balanced fertilizer (10-10-10) can also boost recovery, but avoid over-fertilizing, which can lead to bitter leaves.
I recommend fertilizing in the morning to allow nutrients to absorb before evening dew sets in.
To prevent pests, remove any damaged or yellowing leaves immediately. These can harbor pests and diseases. If you notice holes or chewed edges, treat the plant with neem oil or insecticidal soap.
Regularly check the undersides of leaves, as this is where pests often hide. Healthy kale plants are more resilient to pests and will regrow faster after harvesting.
For continuous harvests, space your cuts about 2-3 weeks apart during the growing season. This schedule allows the plant to recover while keeping a steady supply of fresh leaves. In cooler climates, kale can even become sweeter after a light frost, so don’t hesitate to harvest into early fall.
With the right care, a single kale plant can provide harvests for months!