
Tools
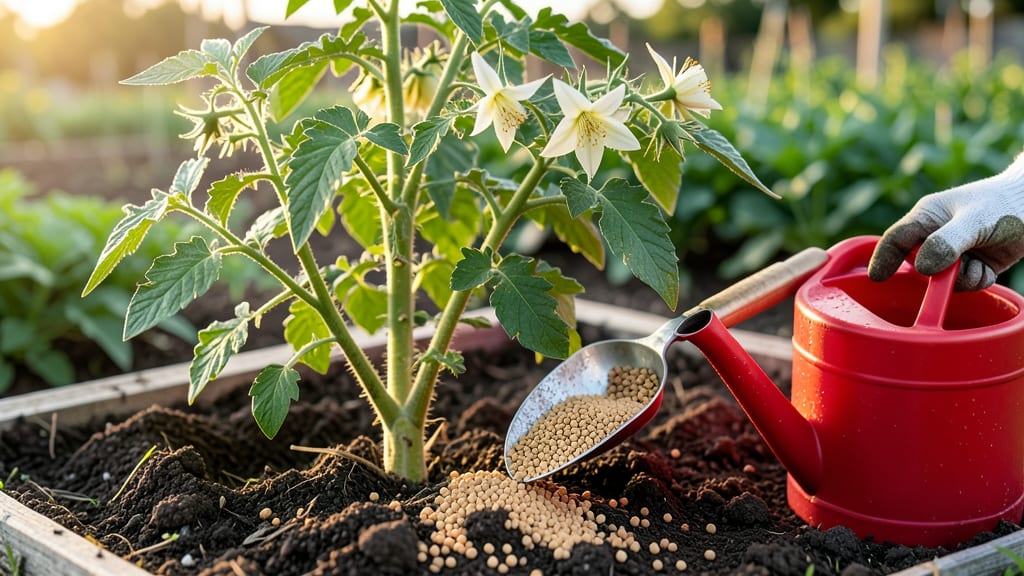
How to use bone meal in the garden is the fastest way to boost root development and bulb growth when applied correctly—think stronger seedlings and bigger blooms in just weeks.
Struggling to get your seedlings to establish strong roots or bulbs to flourish? Bone meal—a fast-acting organic fertilizer—could be your secret weapon for rapid growth. But using it correctly makes all the difference between a thriving garden and wasted effort.
This high-phosphorus fertilizer works best when mixed into soil before planting or sprinkled around root crops like carrots and potatoes. It’s especially useful for flowering plants, where it encourages vibrant blooms and robust growth.
Below, I’ll walk you through the exact steps for applying bone meal—when, where, and how much—to get the best results without overdoing it.
How to apply bone meal for maximum root and bulb growth
Bone meal is my go-to organic fertilizer for boosting root development and bulb formation in the garden. Packed with 10-15% phosphorus, it helps plants establish strong roots quickly—perfect for seedlings, root crops, and flowering bulbs. But timing and application methods matter just as much as the fertilizer itself.
Unlike slow-release organic amendments, bone meal works fast, making it ideal for transplanting or when you need a quick nutrient boost. I’ve seen carrot seedlings double their root mass in weeks and tulip bulbs grow more vigorous shoots after just one application.
The key? Applying it at the right time and in the right way.
Here’s my step-by-step guide to using bone meal effectively for maximum root and bulb growth, whether you’re prepping soil, planting new crops, or side-dressing established plants.
-
1
Test Your Soil First
Before applying, check your soil’s phosphorus levels. A home soil test kit (around $10) reveals if your garden needs phosphorus. Bone meal is best for soils testing low to medium in phosphorus (below 30 ppm). -
2
Choose the Right Plants
Bone meal works best for phosphorus-hungry plants like:- Root crops: carrots, beets, radishes, onions
- Bulbs: tulips, daffodils, hyacinths
- Flowering plants: roses, tomatoes, peppers, squash
-
3
Apply at the Right Time
For seedlings: Mix 1 tablespoon per 10-inch pot or 1 cup per 10 sq ft into the soil 2-4 weeks before transplanting. For bulbs: Apply 2 tablespoons per planting hole when planting in fall (for spring blooms) or early spring. For established plants: Side-dress with 1 tablespoon per plant during early bloom or when fruits/veggies form. -
4
Mix Evenly Into Soil
Use a garden fork or trowel to work bone meal into the top 4-6 inches of soil. For container gardens, blend it into the bottom 2 inches of potting mix before adding plants. Avoid direct contact with roots or seeds—it can cause nutrient burn. -
5
Water Thoroughly After Applying
Bone meal needs moisture to activate. Water the soil deeply (1-2 inches) immediately after application. This helps dissolve the phosphorus and makes it available to plant roots within 24-48 hours. -
6
Monitor for Overuse
Too much bone meal can lead to excess phosphorus, which harms soil microbes and causes imbalanced growth (e.g., lush leaves but poor flowers/fruits). Stick to the recommended amounts and reapply no more than once per season for most plants.
One of my favorite tricks is combining bone meal with compost for a balanced boost. For example, I’ll mix 1 part bone meal with 3 parts compost and 2 parts soil when planting asparagus crowns.
This gives the roots a phosphorus kick while adding organic matter for long-term soil health.
For container gardens, I often add bone meal to the potting mix at planting time and then top-dress again
Bone meal vs. other organic fertilizers: when to use it
Bone meal stands out as a phosphorus powerhouse in the organic fertilizer world, but it’s not always the best choice. With an NPK ratio of 0-10-0, it’s ideal for root development and flowering plants, but other fertilizers offer unique benefits depending on your garden’s needs.
Let’s compare bone meal to alternatives like compost, fish emulsion, and rock phosphate to help you decide when to reach for each.
If you’re growing seedlings, bulbs, or root crops, bone meal’s quick-release phosphorus gives plants the energy they need to establish strong roots and produce abundant blooms.
However, for general soil health or nitrogen-heavy plants like leafy greens, other fertilizers may be more effective. The key is matching the fertilizer to the plant’s stage and needs.
| Fertilizer | Best For | NPK Ratio | When to Use | Application Tips |
|---|---|---|---|---|
| Bone Meal | Seedlings, bulbs, flowering plants | 0-10-0 | Planting time, early growth stages | Mix 1 tbsp per plant or 1 cup per 10 sq ft into soil |
| Compost | General soil health, all plants | Varies (balanced) | Year-round, top-dress or till into soil | Apply 1-2 inches as mulch or mix into garden beds |
| Fish Emulsion | Leafy greens, foliar feeding | 5-1-1 or 2-3-1 | Active growth, foliar spray | Dilute 1-2 tbsp per gallon of water; apply to soil or leaves |
| Rock Phosphate | Long-term phosphorus, soil building | 0-3-0 | Fall or early spring, soil amendment | Broadcast 1-2 lbs per 100 sq ft and till into top 6 inches |
For immediate phosphorus, bone meal is unmatched, especially when planting tomatoes, peppers, or carrots. Its quick-release nature helps seedlings establish roots faster, but it’s not a long-term solution.
If you’re prepping soil for next season, rock phosphate is a better bet—it releases phosphorus slowly over time, making it ideal for soil building.
On the other hand, compost is the jack-of-all-trades fertilizer. It improves soil structure, adds organic matter, and provides a balanced mix of nutrients. Use it year-round to maintain healthy soil, but pair it with bone meal at planting time for a double nutrient boost.
For foliar feeding or nitrogen-loving plants, fish emulsion is your go-to, offering a quick nitrogen kick that’s perfect for leafy greens like lettuce or spinach.
One common mistake is using bone meal as a general fertilizer. It’s not a substitute for balanced nutrition—think of it as a supplement for specific needs.
For example, if your plants are flowering poorly or roots are stunted, bone meal can help, but if they’re yellowing or stunted overall, a nitrogen boost from fish emulsion or compost might be needed instead.
To get the most out of bone meal, apply it 2-4 inches deep in the planting hole or mix it into the soil before sowing seeds. Avoid overapplying—too much phosphorus can lock out other nutrients like zinc or iron, leading to deficiencies.
For best results, combine bone meal with compost or well-rotted manure to create a balanced nutrient profile.