
Container Gardens
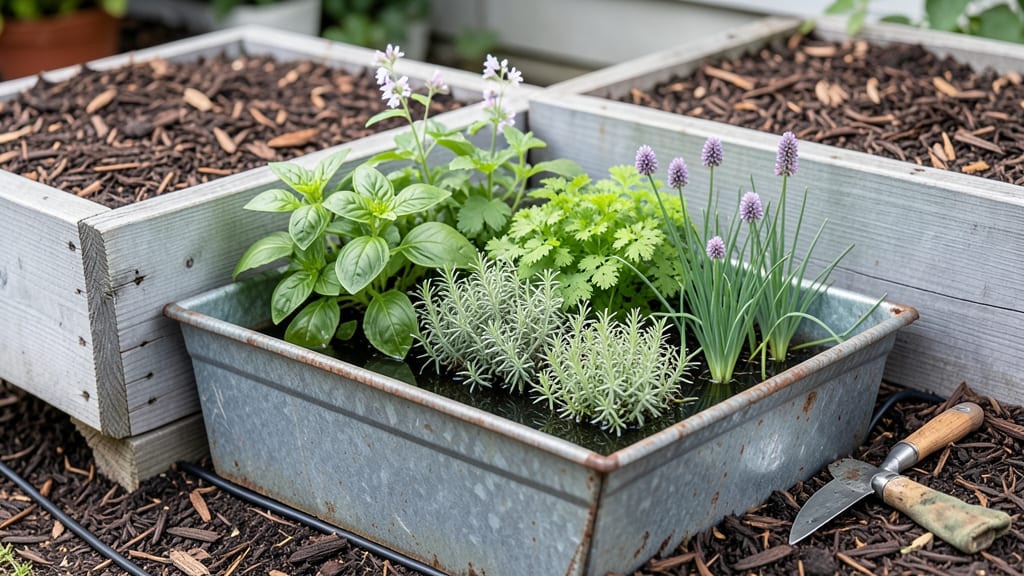
Repurposing water troughs into raised garden beds turns old stock tanks into space-saving growing spaces that hold moisture better than traditional planters.
If you’ve ever stared at a dusty old trough and wondered, "What if I could grow food in this?"—you’re about to find out. These beds solve two problems at once: they give small spaces a lush, productive look while keeping water where your plants need it most.
Whether you’re working with plastic, metal, or rubber troughs, the key is drainage, soil depth, and choosing the right plants. I’ll walk you through the best materials, how to prep them for planting, and which General Water Trough Raised Garden Bed Plants 🌱 thrive in their unique shape.
By the end, you’ll know exactly how to transform a neglected container into a low-maintenance garden that’s both practical and pretty—no green thumb required.


How to convert water troughs into functional raised garden beds
Transforming old water troughs into functional raised garden beds is a creative way to maximize small spaces while minimizing costs. These sturdy containers—whether plastic, metal, or rubber—can be repurposed with minimal effort into stylish, productive growing spaces.
The key lies in proper preparation, drainage, and soil selection to ensure your plants thrive in their new home.
Before diving into the project, assess your water trough material and size. Plastic troughs are lightweight and easy to move, while metal offers durability but may require extra insulation in cold climates.
Rubber troughs provide flexibility and weather resistance. Choose a trough that’s at least 12 inches deep for most vegetables and herbs, though shallow varieties like lettuce can grow in shallower containers.
-
1
Clean and Prepare the Trough
Rinse the trough thoroughly with soapy water to remove dirt and debris. For metal troughs, use a wire brush to scrub off rust. Disinfect with a 10% bleach solution (1 part bleach to 9 parts water), then rinse well to prevent chemical residue from harming plants.
-
2
Drill Drainage Holes
Use a power drill to create drainage holes in the bottom of the trough. Space them 4-6 inches apart to allow excess water to escape. For plastic troughs, pre-drill holes to prevent cracking. Add a landscape fabric layer over the holes to keep soil from washing out.
-
3
Add a Drainage Layer
Line the bottom with 1-2 inches of gravel or broken pottery shards to improve drainage and prevent soil compaction. This layer also helps regulate moisture, reducing the risk of root rot in shallow troughs.
-
4
Fill with Quality Soil
Use a lightweight, well-draining potting mix blended with compost or aged manure for nutrients. Avoid garden soil, which can compact and hinder root growth. Fill the trough to 1-2 inches below the rim to allow for watering and mulching.
-
5
Position for Optimal Sunlight
Place the trough in a location with 6-8 hours of sunlight daily. Most herbs and vegetables thrive in full sun, while leafy greens like lettuce can tolerate partial shade. Ensure the trough is level to prevent water pooling in one corner.
-
6
Plant and Mulch
Choose compact, shallow-rooted plants like herbs, strawberries, or dwarf vegetables. Space plants according to their mature size, and top the soil with 1-2 inches of mulch to retain moisture and suppress weeds. Avoid organic mulch in metal troughs to prevent rust.
Once your trough is planted, monitor the moisture levels closely, especially in hot climates. Water troughs dry out faster than traditional raised beds due to their shallow depth, so aim to water deeply 2-3 times per week rather than lightly daily.
Mulching helps retain moisture, reducing the frequency of watering needed.
For added stability, especially with metal or heavy plastic troughs, consider placing them on brick pavers or wooden planks to elevate them slightly off the ground. This improves airflow beneath the container and prevents water from pooling underneath, which can lead to mold or erosion.
One of the biggest advantages of water trough raised beds is their mobility. You can easily rotate them to follow the sun’s path or move them to protect plants from harsh weather.
This flexibility makes them ideal for balconies, patios, or small yards where space is limited but creativity is endless.
If you’re using metal troughs in cold climates, insulate them during winter by wrapping the sides with bubble wrap or straw bales. This helps protect roots from freezing temperatures.
For plastic or rubber troughs, a simple layer of mulch or frost cloth can make a significant difference in extending the growing season.
With a little creativity, your repurposed water troughs can become the centerpiece of your garden, blending functionality with rustic charm. Whether you’re growing herbs for the kitchen, compact vegetables for salads, or vibrant flowers for pollinators, these troughs offer a sustainable and stylish solution for any gardener.
Best plants for water trough raised garden beds in small spaces
Water trough raised garden beds are perfect for small spaces because they maximize vertical and horizontal growth while requiring minimal maintenance. The key is selecting plants that thrive in shallow root zones and adapt well to container gardening.
These plants should be compact varieties with moderate water needs to prevent overwatering or drought stress.
When choosing plants, prioritize those with shallow root systems and fast-growing habits. Herbs, leafy greens, and dwarf vegetables are ideal because they fit snugly in troughs while delivering high yields.
Additionally, plants that tolerate partial shade or full sun give you flexibility in placement, whether your trough sits in a sunny patio or a partially shaded balcony.
Top 7 Space-Saving Plants for Water Troughs
- 🌿 Lettuce (Leaf Varieties) - Buttercrunch, Oakleaf: Grows in 30-50 days, thrives in partial shade, and harvest leaves as needed.
- 🍓 Strawberries (Alpine Varieties) - Seascape, Alpine: Produces fruit in 6-8 weeks, needs full sun, and trails beautifully over trough edges.
- 🌱 Radishes (Cherry Belle): Ready in 25-30 days, loves cool weather, and fits perfectly in tight spaces with minimal depth.
- 🌿 Spinach (Baby's Leaf): Harvest in 30-40 days, tolerates partial shade, and regrows after cutting.
- 🌱 Bush Beans (Contender): Compact 18-inch plants, produces in 50-60 days, and fixes nitrogen in soil.
- 🌿 Basil (Genovese): Thrives in full sun, grows to 18-24 inches, and loves frequent harvesting.
- 🌱 Chives (Garlic Chives): Perennial, 12-inch height, and regrows yearly with minimal care in partial sun.
For herbs and greens, focus on varieties that stay small and productive, like bush basil or swiss chard. These plants not only save space but also provide continuous harvests throughout the growing season. Pair them with edible flowers like nasturtiums for added color and pest control.
When planting, ensure your trough has drainage holes to prevent root rot, especially for moisture-sensitive plants like lettuce or spinach. Use a lightweight potting mix with perlite or vermiculite to improve aeration. Water deeply in the morning to encourage strong root growth and reduce evaporation.
With the right plant selection, your water trough raised garden bed can become a high-yielding, low-maintenance oasis. Start with 2-3 varieties to test what thrives best in your space, and don’t hesitate to experiment with succession planting for year-round harvests.