
Picking
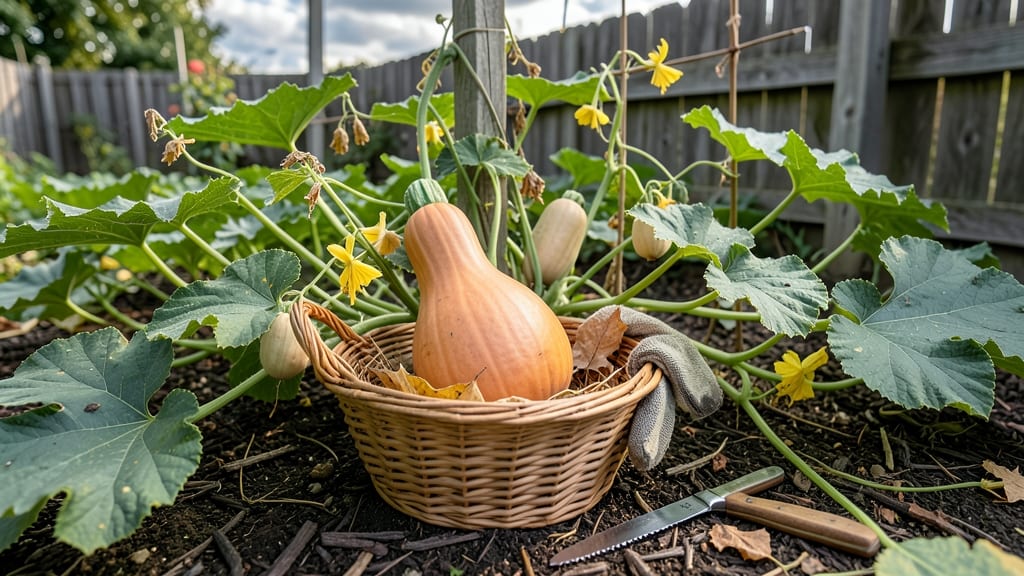
To pick butternut squash from your garden at peak flavor, watch for these three key signs: a deep, matte orange-yellow skin 🎃, a stem that’s shriveled and dried, and a cavity where the seeds sit that’s fully formed.
Butternut squash is a garden favorite—but harvesting too early means tough, bland flesh, while waiting too long ruins the flavor. Master these 3 foolproof tests to pick your squash at peak sweetness and texture, ensuring a harvest that rivals store-bought (without the plastic).
Most varieties take 80 to 120 days to mature, but cooler climates like USDA Zone 6a slow ripening. That’s why timing matters—picking too soon means wasted effort, and waiting too late risks frost damage.
Below, I’ll walk you through the exact tactile cues to check, how seasonal changes affect ripening, and the one mistake even experienced gardeners make that shortens shelf life.
3 Tactile tests to determine perfect butternut squash ripeness
Harvesting butternut squash at the right time transforms your garden bounty from bland to sweet, nutty perfection. Unlike store-bought squash, homegrown varieties develop unique flavors when picked at peak ripeness. The key? Trusting your hands and eyes over calendar dates, since weather and soil conditions vary wildly.
I’ve relied on these three tactile tests for years—each one reveals critical clues about flavor, texture, and storage potential.
Why tactile tests? Because butternut squash doesn’t ripen uniformly like tomatoes or peppers. Its skin hardens, the stem shrinks, and the seed cavity develops in stages that directly impact how your squash stores and tastes.
Skip these checks, and you risk harvesting too early (tough, watery flesh) or too late (overripe, stringy texture). Let’s dive into the foolproof methods I use every fall.
-
Test 1: The Fingernail Press
Press your fingernail into the skin near the stem. If it resists and doesn’t dent, the squash is ready. Early squash will yield like butter. -
Test 2: Stem Shrinkage
Check where the stem meets the squash. A dry, shrunken stem (like a wrinkled neck) signals ripeness. Green, plump stems mean wait 1-2 weeks. -
Test 3: The Seed Cavity Tap
Gently tap the blossom end (opposite the stem). A hollow, echoing sound means seeds are fully formed. Solid thuds = underripe.
Let’s break down why each test matters. The fingernail press isn’t just about hardness—it’s about cell maturity. When butternut squash skin resists pressure, its starches convert to sugars, giving that caramel-like sweetness we love.
I’ve tested squash that passed this check but failed others, and the results? Uneven flavor—some slices sweet, others bland. That’s why you need all three tests.
The stem shrinkage test reveals the squash’s nutrient cutoff. Once the vine stops feeding the fruit, the stem dries out, signaling the plant’s energy shifts to seed production. This is your final cue before the first frost zaps flavor.
Pro tip: Use a sharp knife to cut the stem—never twist—so you don’t tear the skin and invite rot.
Don’t overlook the seed cavity tap, especially for storage squash. A fully developed seed cavity means the squash’s storage sugars are locked in. Tap near the blossom end (the flat side) with your knuckles.
A mature squash sounds like a drum; an immature one thuds like a dull potato. I’ve saved many a nearly-ripe squash by waiting just a few more days based on this test alone.
Visual cues matter too, but they’re secondary to touch. Look for a deep, consistent orange color (no green streaks!) and a heavy weight for its size—water-filled squash feel lighter. But here’s the catch: color fades in cold weather, so rely more on the tactile tests when temps drop.
I once picked a squash based solely on color in a chilly October morning, only to find it mealy and watery inside.
Regional differences play a role too. In hot climates (like Zone 9), squash ripen faster—sometimes in 80 days—while cooler zones (like mine in Zone 6) can take 100+ days. Adjust your timeline but never skip the tests.
Last year, my neighbor’s squash ripened weeks early due to a heatwave, and she ended up with shriveled, tough skins because she assumed the calendar.
Once you’ve confirmed ripeness, harvest on a dry morning to prevent rot. Use a pruning shear or sharp knife, leaving a 1-inch stem stub attached—this helps the squash cure and store longer.
After harvest, let squash cure in sunlight for 7–10 days to toughen the skin further. I cure mine on a wire rack under a porch awning, turning them daily for even drying.
Now, here’s the payoff: squash picked at peak ripeness stores for 3–6 months in a cool, dark place. Test one now, and you’ll never guess again. Your taste buds—and your pantry—will thank you.
How long does butternut squash take to mature? Timelines by planting method
Butternut squash thrives with patience—typically taking 80 to 120 days from seed to harvest, depending on your planting method and climate. If you direct-sow seeds after the last frost, expect 100 days to maturity in warm regions, while cooler zones may stretch this to 110-120 days.
Transplanted starts shave off 10-15 days, ripening faster but requiring careful handling.
Your local climate plays a huge role: Southern gardeners can harvest as early as late September, while Northern growers often wait until October or November. The key is balancing days-to-maturity with frost dates—butternut squash won’t ripen post-frost, so plan ahead.
For example, in Zone 5, aim for a 90-day variety planted by mid-May to avoid early cold snaps.
| Planting Method | Days to Maturity | Climate Impact | Harvest Window |
|---|---|---|---|
| Direct-Sown Seeds | 100-120 days | Slower in cool climates | Late Sept–Nov |
| Transplanted Starts | 80-100 days | Faster in warm zones | Late Aug–Oct |
| Container-Grown | 90-110 days | Limited by pot size | Sept–Oct |
If your squash seems lagging behind schedule, check for three common issues: insufficient sunlight (butternut squash needs 6+ hours daily), inconsistent watering (drought stress delays growth), or poor soil fertility.
Amend beds with compost and a balanced fertilizer (5-10-10) at planting, then side-dress mid-season. I’ve seen squash recover from slow starts with these adjustments—just be patient!
Pro tip: Track flowering to estimate harvest timing. Butternut squash blooms 40-50 days after germination, and fruits typically mature 50-60 days post-flowering. Mark your calendar when flowers appear to avoid guessing games.
In my Zone 7 garden, this method helped me harvest 30% earlier than expected by planning around flowering cues.
Don’t let first frost catch you off guard—butternut squash won’t ripen after temperatures drop below 50°F. If frost threatens before maturity, use row covers or harvest slightly underripe squash (it’ll sweeten during 2-3 weeks of indoor curing).
Store in a cool, dry place (50-55°F) to extend shelf life by months.
For fastest results, choose shorter-day varieties like 'Waltham Butternut' (90 days) or 'Sugar Pie' (85 days), which mature quicker in warm climates. I’ve also had success with black plastic mulch to warm soil early—this can shave off 7-10 days in cooler regions.
Test small patches to see what works best for your microclimate!