
Picking
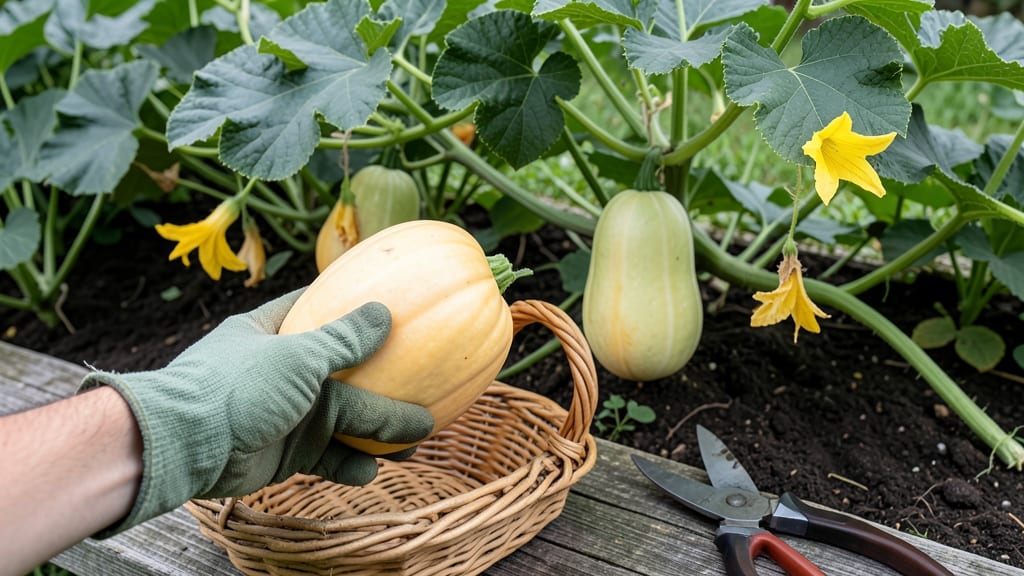
To pick spaghetti squash from your garden at the perfect moment means the difference between tender, noodle-like strands and a tough, unyielding mess.
Picture this: you’ve waited months for your 🍠 to ripen, only to slice into it and find the flesh as stringy as overcooked pasta. That’s the risk when you miss the window—either too early or too late—and it happens more often than you’d think.
Luckily, spaghetti squash gives clear signals when it’s ready: a dull yellow rind, a skin that resists your thumbnail, and vines that’ve started to wither. These three tactile tests are your shortcut to harvesting at peak flavor and texture, no guesswork required.
Below, I’ll walk you through exactly how to read these cues, adjust for your climate, and even salvage a squash that’s slightly off—so you never end up with a kitchen full of regret.
3 Tactile tests to determine spaghetti squash ripeness
Spaghetti squash thrives when harvested at peak ripeness, transforming from tough and fibrous to tender, stringy strands perfect for your plate. The key lies in three simple tactile tests that combine visual cues with hands-on checks.
Unlike other squash varieties, spaghetti squash relies more on texture and stem separation than color alone—so skip the guesswork and use these foolproof methods to ensure your harvest delivers that coveted noodle-like texture.
I’ve learned the hard way that waiting for the perfect moment makes all the difference. A squash picked too soon will yield watery, underdeveloped strands, while one left too long becomes woody and bitter.
The good news? These tests take seconds and require no special tools—just your hands and eyes. Whether you’re a seasoned gardener or a first-timer, mastering these checks will turn your harvest from hit-or-miss to consistently delicious.
- 1 Rind Color Test: Press your thumbnail into the squash’s skin. If it doesn’t dent and the color shifts from bright green to dull yellow, it’s ready. Bright green means not ready, while orange-brown patches signal overripeness.
- 2 Stem Separation: Gently twist the stem at its base. If it snaps cleanly with minimal resistance, the squash is prime for harvest. A stubborn stem means wait 3-5 more days, while a mushy stem indicates overripeness.
- 3 Weight-to-Size Ratio: Lift the squash—it should feel heavy for its size, like a dense melon. Tap it: a deep, hollow sound confirms ripeness. Lightweight squash? Wait another week. Overly heavy with a dull thud? It’s past its prime.
For me, the rind color test is the most reliable early indicator. I start checking squash about 85 days after planting, even if they’re not yet dull yellow. The trick? Focus on the stem end—this area ripens first and gives the most accurate read.
If the skin near the stem is hard and yellow but the sides are still green, give it another 5-7 days in the garden.
Don’t overlook the stem separation test, especially in humid climates where squash can rot on the vine. A clean break at the stem means the squash has finished absorbing nutrients and is ready to be picked.
Pro tip: Use a sharp pruner to avoid damaging the vine, which can stress the plant and reduce future yields. I always harvest in the morning after dew has dried—this minimizes the risk of fungal issues.
The weight-to-size ratio is my final sanity check. I’ve had squash that looked perfect by color and stem but were hollow inside because they didn’t get enough water during a dry spell.
To prevent this, I deep-water my plants every 3-5 days during the growing season, especially when fruits start forming. A well-hydrated squash will always feel firm and substantial, not lightweight or spongy.
One common mistake I see is relying solely on color changes. While a dull yellow rind is a good sign, some varieties (like ‘Gold Rush’) stay green longer but still ripen internally. That’s why the thumbnail test is non-negotiable.
If your nail doesn’t leave a dent, the squash needs more time. If it punctures easily, it’s overripe—though I’ve salvaged a few by roasting them immediately for a sweeter, caramelized flavor.
Climate plays a huge role in ripening speed. In hot, dry regions, squash may ripen faster (sometimes in as few as 75 days), while cool, cloudy summers can stretch maturity to 110+ days.
I adjust my harvesting schedule by watching the vine health: when the leaves start yellowing and the vines die back, it’s a clear signal that the squash is nearing peak ripeness. This is especially useful for late-season varieties like ‘Cocozelle,’ which thrive in shorter growing seasons.
Once you’ve confirmed ripeness, harvest with a clean cut using pruners or a knife, leaving a 1-inch stem attached. This helps the squash cure properly and last longer in storage.
After harvest, let them cure in a dry, shady spot for 3-5 days—this toughens the skin and improves shelf life. Store cured squash in a cool, dark place (like a root cellar) where they’ll keep for 2-3 months.
If you’re unsure about timing, err on the side of harvesting slightly early—you can always let them ripen indoors with a little patience.
Mastering these tactile tests has turned my spaghetti squash harvests from hit-or-miss to consistently perfect. The best part? These methods work for any variety, whether you’re growing ‘Honey Bear’ for its sweetness or ‘Sunburst’ for its compact size.
Next time you’re eyeing those squash in your garden, skip the guesswork—grab your thumbnail and give these tests a try!
Optimal harvest timing: days to maturity vs. seasonal clues
Understanding spaghetti squash maturity isn't just about counting days—it's about reading your local climate and plant signals. While most varieties reach harvest readiness in 80-120 days, extreme heat or cool snaps can delay ripening by 1-2 weeks.
I've learned that seasonal adjustments are key, especially when growing in USDA Zone 6a or warmer regions.
Your squash's days to maturity serve as a baseline, but weather patterns often dictate the final harvest window. For example, a hot summer might speed up ripening, while a cool fall could stretch it out.
I always check my local frost dates and adjust planting times to ensure I harvest before the first frost hits.
Here's how to balance plant age with seasonal cues for perfect timing:
| Factor | Zone 6a Timing | Warm Climate Adjustment | Cool Climate Adjustment |
|---|---|---|---|
| Days to Maturity | 80-120 days | Subtract 5-7 days | Add 7-10 days |
| Planting Window | Late April-early May | March-April | May-June |
| Harvest Window | September-October | August-September | October-November |
| Key Seasonal Cue | Vine yellowing | Early vine dieback | Delayed vine yellowing |
| Frost Risk | October 31 | Earlier frost dates | Later frost dates |
In Zone 6a, I've found that early September is typically prime harvest time, but I always monitor vine health more closely than calendar dates. When vines start yellowing and dying back—even if the squash isn't at full days-to-maturity—it's often a sign to harvest soon.
This seasonal shift helps me avoid overripe squash that becomes watery.
For gardeners in warmer climates, you can push harvests earlier by 1-2 weeks since heat accelerates ripening. I once grew spaghetti squash in Zone 9b and harvested mine by mid-August—about 3 weeks early—because the intense sun sped up maturity.
Always check for rind hardness and color changes before relying solely on days-to-maturity.
In cooler regions, extend your planting window by 2-3 weeks later to match your frost-free period. I've successfully grown spaghetti squash in Zone 5b by starting seeds in early June and harvesting in late October.
The key is watching for stem separation—when the stem pulls away easily from the vine—and rind color shifting to dull yellow.
Remember, local microclimates matter too. A south-facing wall or black plastic mulch can add 2-3°F warmth to your garden bed, potentially shaving 5-7 days off maturity. I always keep a harvest journal to track these variations year after year.