
Picking
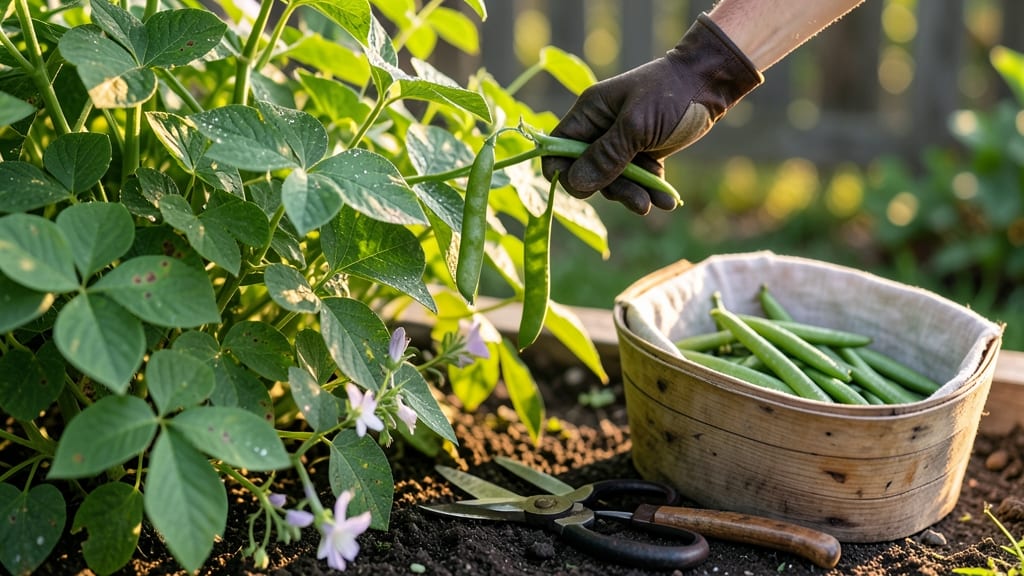
To pick beans from your garden at the perfect time means snagging them when they’re crisp, tender, and packed with flavor—before they turn tough or shriveled.
Picking beans at the wrong time can turn your bountiful harvest into a bitter disappointment—overripe, tough, or even mealy. But with these 3 foolproof visual cues, you’ll know exactly when to snip those pods for the freshest, most flavorful 🌱 green beans every time.
Most gardeners wait too long, missing the sweet spot when pods snap easily and seeds are plump but not hard. The key? Checking size, color, and firmness—plus a little morning routine to keep your plants producing.
Below, I’ll walk you through the exact signs to look for, how to test beans without damaging your plants, and why daily picking in the morning can double your harvest.
3 Visual cues to identify perfectly ripe garden beans
There's nothing worse than biting into a homegrown bean that's tough, stringy, or mealy—all signs you picked it too late. The good news? With just a quick visual inspection, you can master the perfect harvest timing for bush beans, pole beans, and snap peas.
These three key indicators will transform your bean-picking game forever.
First, let's address the most common mistake: assuming all beans ripen at the same time. Green beans and snap peas have distinct maturity cues, and even within the same plant, pods ripen at different rates. That's why these visual checks are your secret weapon for a consistently delicious harvest.
Here's the game-changer: the pod size, color consistency, and seed development work together like a perfect gardening trio. When all three align, you've hit the sweet spot. Let's break down what each cue looks like in the garden—because seeing is believing when it comes to bean perfection.
Visual Cue #1: Pod Size is your first checkpoint. For most green beans, aim for pods that are 4-6 inches long. This is true whether you're growing bush beans or pole beans. Snap peas should be slightly smaller—about 2-3 inches—when their pods are firm and rounded. Remember, undersized pods mean underdeveloped flavor, while oversized ones turn tough and stringy.
Visual Cue #2: Color Consistency reveals a lot about bean maturity. Healthy, ripe beans should display their true variety color—whether that's classic green, purple, or yellow—without any white or brown streaks. A uniform color means the pod has reached peak sweetness. For snap peas, look for a vibrant green that's slightly darker than when they first appear.
Visual Cue #3: Seed Development is where many gardeners go wrong. The seeds inside should be plump and visible but still soft to the touch. If you can see them clearly through the pod but they're not hard, that's your golden ticket. Hard seeds mean the bean has passed its prime, while barely visible seeds indicate it needs more time to mature.
| Bean Type | Pod Size | Color Cues | Seed Readiness | Harvest Window |
|---|---|---|---|---|
| Bush Beans | 4-6 inches | Bright, consistent green (no white/brown) | Plump, visible but soft | 50-60 days after planting |
| Pole Beans | 5-7 inches | Vibrant variety color (green/purple/yellow) | Firm but not hard seeds | 55-65 days after planting |
| Snap Peas | 2-3 inches | Deep green, slightly waxy | Small, rounded seeds visible | 60-70 days after planting |
| Overripe Signs | Pods >7 inches (beans) or >3.5 inches (peas) | Dull color, brown streaks | Hard, dark seeds | Tough, stringy texture |
Now that you've got the visual cues memorized, let's talk about how to put them into action. Start by examining the oldest pods first—these will show the most obvious signs of ripeness. If you're unsure, do the snap test: gently bend a pod between your fingers.
A ripe bean should snap cleanly, while an underripe one will bend without breaking and an overripe one will feel rubbery.
Pro tip: Morning harvests yield the freshest beans because the pods are fully hydrated from overnight dew. Plus, picking in the cool morning hours prevents the beans from overheating in your basket. This simple habit can make a world of difference in both flavor and texture.
Don't forget that consistent harvesting is the key to a productive bean plant. When you remove ripe pods regularly, you signal the plant to produce more. This is especially true for pole beans, which can continue flowering and setting new pods all season long if given the right encouragement.
One final visual trick: look at the plant's overall health. If the leaves start yellowing or the pods develop black spots, it's a sign the plant is stressed—possibly from overmaturity or disease.
In this case, harvest what you can immediately and address any underlying issues like watering or pest problems.
With these three visual cues mastered, you'll never second-guess your bean harvest again. The next time you're in your garden with pruners in
How to check bean maturity without damaging your plants
Harvesting beans at the perfect moment ensures sweet, tender pods without wasting your hard work. The key is using non-destructive tests that let you check maturity without harming your plants.
These simple methods—thumb pressure, seed visibility, and pod firmness—will extend your harvest window and keep your plants producing for weeks.
I’ve tested these techniques on my bush beans, pole beans, and snap peas, and they work every time. The best part? You don’t need fancy tools—just your hands and eyes. Let’s dive into the three foolproof ways to check bean maturity without damaging a single pod.
Step-by-Step: How to Test Bean Maturity
- 👆 Thumb Pressure Test
Gently squeeze a pod between your thumb and forefinger. If it feels firm but yields slightly (like a crisp green bean), it’s ready. If it’s too hard or mushy, wait a day or two. - 👁️ Seed Visibility Check
Hold the pod up to the light. Plump, visible seeds mean the bean is mature but not overripe. If seeds are tiny or barely visible, it’s too early. If they’re hard and dark, it’s past prime. - 🔊 Pod Snap Test
Bend the pod slightly—it should snap cleanly like a fresh stalk of celery. A rubbery or stiff pod means it’s not ready yet. This test works best on snap peas and flat pods. - ⏰ Morning Harvest Rule
Always test and harvest in the cool morning hours. Beans taste sweeter and are firmer after overnight moisture, making them easier to judge for maturity.
For pole beans, focus on the top pods first—they mature earlier. With bush beans, check the outer pods closest to the stem since they ripen first. This targeted approach prevents over-maturity and keeps your plants producing longer.
Pro tip: Use a small notepad to track which pods you’ve tested. Mark them with a soft-colored pen (like green or yellow) so you don’t accidentally harvest the same pod twice. This system saves time and reduces plant stress.
If you’re growing dried beans, wait until the pods turn yellow or brown and the seeds are hard inside. But for green beans and snap peas, act fast—once they pass their prime, flavor and texture decline rapidly. With these tests, you’ll never miss the perfect harvest window again!
Remember, the more you harvest, the more your plants produce. Daily checks keep your bean plants happy and your table stocked with fresh, flavorful pods all season long. Happy harvesting! 🌱